Mastering the art of tying a tie is a fundamental skill every gentleman should know, especially the Windsor knot. Known for its wide, symmetrical base, the Windsor knot provides a touch of classic sophistication suitable for formal occasions and important business meetings. Here’s a simple step-by-step guide to tying a Windsor knot.
Step 1: Start with the Tie
Place the tie around your neck, ensuring that the wide end is approximately 12 inches longer than the narrow end on your right side. The exact length may vary depending on your height and the length of the tie.
Step 2: Cross Over
Cross the wide end over the narrow end to create an X-shape just below your chin. This step is crucial as it lays the foundation for subsequent folds.
Step 3: Loop Around
Take the wide end and bring it up through the neck loop from underneath. This move will point it upward toward your chin, setting up for further maneuvers.
Step 4: Go Down
Pull the wide end down through the loop you just created in front. This action forms a simple knot which will serve as the base of your Windsor knot.
Step 5: Around Back
Wrap the wide end around behind the narrow end so it comes out on your right side from behind. Ensure this wrap is snug but not overly tight.
Step 6: Up Through The Neck Loop Again
Now bring the wide end up from underneath and pull it through the neck loop again, just like in Step 3 but in reverse direction – this time towards your left side.
Step 7: Through The Front Knot
Hold onto what you have formed so far with one hand while using your other hand to guide the wide end through that front knot you created in Step 4.
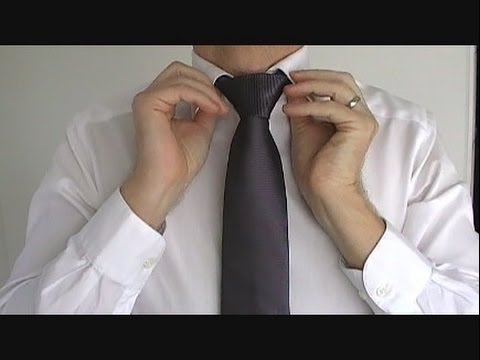
Step 8: Tighten and Adjust
Pull down on both ends to tighten while you slide up to adjust where necessary. Ensure that your tie hangs centered between both collar points with no twists or slack loops around your neck area.
Tips for Perfecting Your Windsor Knot:
– Keep each layer slightly loose as you make them; this helps manage space within each fold and prevents tight bunching.
– Use a mirror to help guide your adjustments as symmetry is key with this knot.
– Practice makes perfect; don’t be discouraged if it takes several tries to get right!
With these steps, you should now have a beautifully tied Windsor knot! It is ideal for enhancing any dress shirt and adding an element of polished professionalism to your outfit. Whether you’re preparing for an interview or attending a wedding, mastering this classic tie knot will ensure you look sharp and confident.